For those who might be interested, here are some details of boat maintenance and teak deck renovation on a Swedish sailboat from the eighties, more particularly a Vindø 995 🙂
I had for a long time considered doing something about the teak decks. They looked grim, and were difficult to keep clean and free from green growth. After more than thirty years, they seemed quite worn, having been subject to hard scrubbing so that there were deep furrows in the grain. In addition, some of the caulking grooves were almost worn away, or rather, the teak next to them, with the result that the caulking was gone. This was especially the case on the coach roof.
The job took longer than expected, of course. I took the boat up in November 2018, and she was not ready for the first sail until mid July this year (2019). Therefore there were few sailing trips this year, but I will share some pictures in another post.
Here is the result (wet deck):

But let’s start from the beginning.
I consulted several YouTube-channels, talked to people with knowledge and skills, and read books and articles. There could be several solutions to renovate the decks. I could tear off all the teak, getting down to the fiber glass underneath, seal all the screw holes, smooth the surface and put on non skid paint. This would give nice, clean decks, easy to keep, and could also be nice to look at. Laying new teak was not an option. One thing would be the price, or the amount of work if I should do it myself. Another thing was the environment issue, using timber that probably would come from rain forests that need to be protected. Yes, there is sustainable production of teak, but this may not be of the same quality, and the international trade in this kind of timber is likely to be difficult to trace anyway.
Another considerstion was to find a good place to work, dry, with place for tools, good light and so on. I knew I had to bring the boat ashore, doing this kind of work while the boat was on the water during the winter would not work well, I thought.
Discussing this with my brother, he said that he too wanted to take his boat up for a clean up and paint and varnish job. What if we hired transport together and put the boats next to each other close to his green house?


So we did, November 2018, with very good help from professional transporters. (So far they have not sent a bill, even after two or three reminders. I asked them what they live from. “Happy customers”, was the answer.)
My brother’s boat is a Colin Archer inspired 29 foot sloop by Randesund, Kristiansand, around 1990.
From the green house across the road we could get water and electricity. It was quite a job to build the tent over the boats, but we were quite pleased when we had done it. Now we had a good place to work, or so we thought.


So what would be the best solution for the decks? Here’s what they looked like (coach roof and side decks):


I was confident I would find out what to do, I just needed some time and to do some checks. I knew that the deck is built up by two layers of five millimetres of fiberglass with fifteen millimetres of balsa in between. The teak is fastened with screws that go through the upper layer. Around 700 screws on the coach roof alone. Everybody who has an opinion about it, or experience with such decks, say that there is guaranteed to be moisture in the balsa wood.
I found that there was 8-10 mm of teak left on the roof, so it should be enough to sand down. But the problem was the caulking seams. I tried to refreshen them and make them deeper, both with a router and with a sharp knife, but it was difficult not to damage the teak. I made my decision: off with it!
That proved to be a bigger job than I first thought! The Vindø yard did a very good job when they built these boats. It turned out that the teak was glued down with a very strong bonding. With the help of my two sons, we spent around ten hours between us just to remove the teak. We cut across with a circular saw, every 20 cm or so, and chiseled off every bit and piece. And still there was the job of cleaning off the glue.


It turned out there was non skid pattern under the teak, but I had to sand the fiber glass to clean it properly, so I could not save the non skid. But what about the balsa? I cut out two slots, 6×60 cm, where I had planned to make fastenings for sheet tracks for a future smaller fore sail on an inner stay. At some other points I also cut out holes to get to the balsa. And would you believe it! It was bone dry! As if it had been put in last month. Freshly colored, crisp and light as balsa should be. Note the screw holes in the fiber glass.


That was a relief! Now the job was rather stright forward: scrape off old glue, sand down, lay on epoxy filler, sand, more filler, sand. Finally I rolled on a coat of epoxy, before a coat of primer and two coats of polyurethane paint (the paint was put on after the boat was back on the water). Note the fastenings for the sheet tracks. They are teak, glued down with epoxy, covered with glass mat and epoxy.

Hatches are removed of course. The glass was full of small cracks and will be replaced.
The hand rails were also removed, sanded and fastened back on after paining. Oiled teak on white paint is beautiful, I think.
I mentioned the tent. It didn’t last the first storm, and had to be taken down. For most of the time, I worked under the tent that is used for winter storgate, with two to three layers of heavy tarpauline over. It was cramped, but the boat stayed dry! Some days I could pull back the tarps and work under the blue sky. With hind sight, we should have built better covers, or tried to find a hall, but all in all, we managed to do what we wanted to do, although with some extra hours for securing the boats in the wet winter.
But what about the side and forward decks, or main deck? Although this should be more worn due to more traffick, they seemed to be in better shape than the coach roof. Still, it was in need of serious restoration, but I wanted to keep the teak. I then made some interesting disvoveries. It turned out that most of the teak was just screwed on, without any use of glue. After having removed the screws, the wood could just be lifted off! Also here, the thickness was 8-10 mm. I took off all the teak that could be removed on the port side and the fore deck. Only some few strips were glued on here, which were left on. I made this tool to carve out the caulking.


Eventually, spring came, with extended periods of good weather. We put the boats back on the sea early May, and I continued working under cover.


The strips that could be removed were plained and sanded clean, and the grooves for the caulking cut deeper, which was of course easier when I could work on each one separately.


But the balsa here must surely be wet? How could water not get through when there was no glue or sealing compound under the teak? I made holes along the side deck, and on the fore deck to find out. But no, also here I found dry and fresh balsa, except for the last 30-40 cm at the far back. Here water collects and does not drain out, so understandably it gets into the deck. Putting back the teak, I first smeared thickened epoxy around the screw holes and fastened it back with the screws. I had to make nearly a thousand bungs.


Looks nice, doesn’t it? The caulking is Sealine 100, which I got from Hallberg Rassy. It is now discontinued.
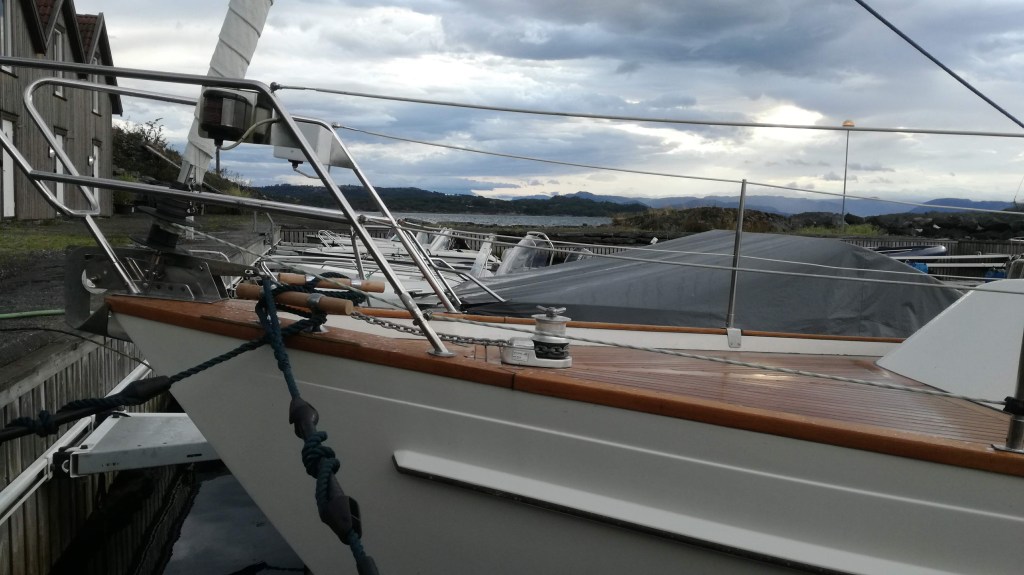
Note the stanchion bases in the pictures above. They are a weak point, having been bent by the momentum of the stanchions. Something has to be done, more on this later.
The teak rails on the last Vindø models are made from one inch teak, very solid and with a wide, flat top to step on, better than Hallberg Rassy or Najad’s, which are narrower and rounded. They were also planed and sanded down, and treated first with several coats of Hempel’s teak oil, then with a mix of the same oil and Owatrol teak oil. I made some tests with several oils and one branch of varnish over the winter.

Here’s the result after one winter and spring out in the open. The Owatrol seemed to fair best, together with the Epifanes varnish, but I did not want the rails to be that shiny. Hempel teak oil on the far left below. I think that the above mentioned mix will be a good choice, but time will tell. I will have to repeat the treatment may be two or three times a year, but by using a cloth it is an easy and quick job, and a rewarding one.

One beautiful Sunday one of the first Vindøs visited our marina, a 28 from 1965, beautifully restored and kept. So, the first and the last models of Vindø at the same place!

As mentioned, the glass in the hatches was replaced. I took the old glass to a shop and had new ones made. The material is acrylic.


Here is the result of the deck job, by August. The starboard side deck is yet to be done:


The stanchion bases: This is a solution I have only seen on the Vindø 995. The problem is that they are too weak, having been bent after many years of abuse. I had one of them strightned and reinforced by a workshop, and was very pleased with that. So now I have taken off all the remaining seven an sent in for the same process. It was a tricky job to remove the bases, with through bolts and nuts in the narrow channel under the rail. When this channel is taken up by two conduit pipes, plus at some places is hidden behind panels, the solution was to drill out the bolt heads. It will be an interesting and exciting job to put them back on! May be I will just fasten some of them with heavy duty self tapering screws.
The boat is at the workshop as I write (13 October), because I also want to have a bowsprit and handholds along the wind screen to be made. I expect to pick up the boat end of October, beginning of November. 


2 responses to “Teak deck renovation and other maintenace jobs”
Hello!
I am trying to help a friend to get some information about his Vindø 995 (the second type built in 1994). Maybe you could help :). He has noticed that when he fastens the rigging harder he cannot close the head doors, as the mast is pressing down. He is wondering what type of material there is in the mast foot. Do you maybe have an idea? All the best!
Hi, I don’t know what the mast foot is made from (suppose you mean the support from the deck down to the keel). It is encapsulated in wood. I have had the same on my boat. That is, the door to the forepeak, in the bulkhead under the mast, jammed. I just adjusted the door, and it seems stable now. The setting of the rig is checked by a professional, so the tension is ok.